
Materials
- Haemocytometer and coverslip
- Tissue
- Alcohol
- Lens tissue
- Water
- Suspension of yeast cells
- Capillary tube
- Petri dish with moist tissue
- Microscope
Setting up the slide |
|
|---|---|
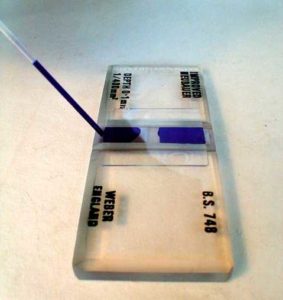
| 1. Clean the haemocytometer with alcohol, then wipe with lens tissue. (Photos shown do not have micro-organisms present) | |
| 2. Using a damp tissue, moisten the slide as shown in diagram. | 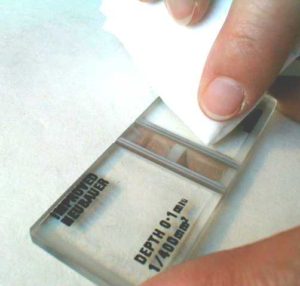 |
|
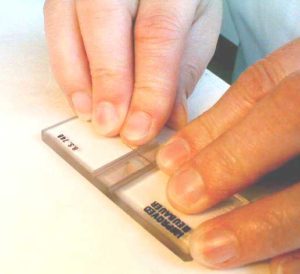
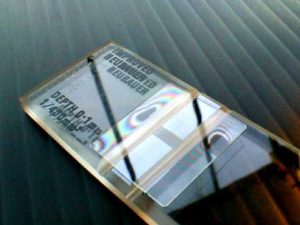
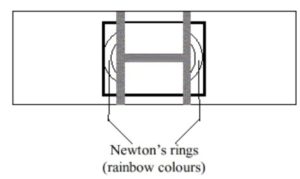
3. Push the special coverslip on to the slide as shown in diagram, pressing down on the outside edges of the coverslip at the same time until you can see Newton’s rings (see diagram). If you push the centre of the coverslip, it is likely to break.
|
  |
| Step 1 | 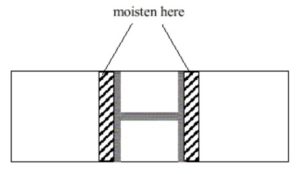 |
| Step 2 | 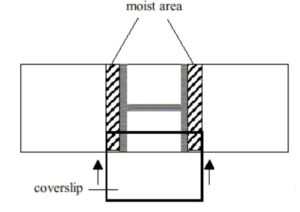 |
| Step 3 | 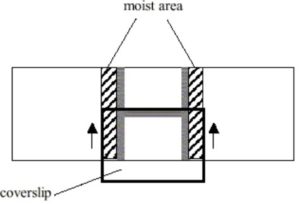 |
 |
|
Loading the Haemocytometer |
|
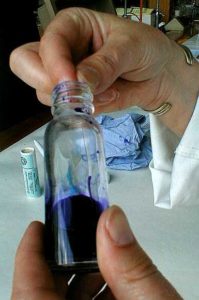
| 4. Shake the cell suspension gently. | |
|
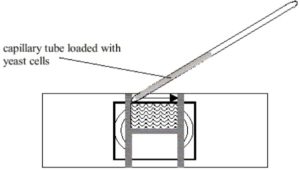
5. Insert the end of the capillary tube into the suspension. The liquid will rise into the tube.
|
 |
|
6. Run the end of the capillary tube along the edge of the coverslip between the arms of the ‘H’. The suspension should fill the area between the coverslip and the top half of the ‘H’ (shaded in diagram below). If the suspension flows into the troughs (the lines of the ‘H’), clean the slide and start again. |
  |
| 7. Turn the slide through 180° and repeat for the opposite edge of the coverslip. | 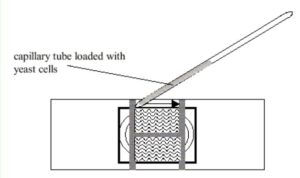 |
|
8. Place the haemocytometer on a damp tissue in a Petri dish for at least two minutes to equilibrate. |
|
Counting the cells |
|
| The haemocytometer has two grids situated as shown in the diagram. | 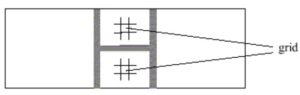 |
| 1. Place the haemocytometer on the microscope stage | 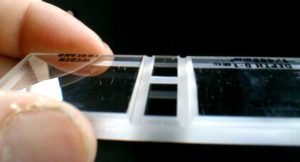 |
| 2. Using the instructions for use of the microscope, examine the haemocytometer using the 4x objective lens. You should be able to view one whole grid as shown in the diagram | 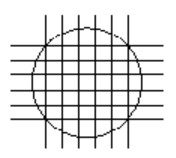 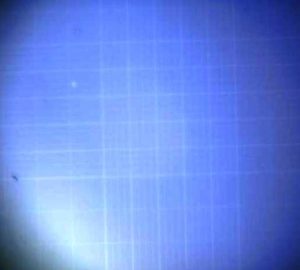 |
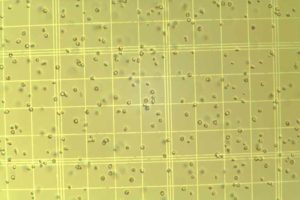
| 3. Increase the magnification to the 10x objective lens. You should be able to see the 25 central squares, each of which is divided into 16 smaller squares (see diagram at instruction 4). | 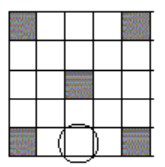 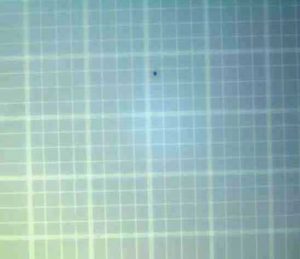 |
| 4. Increase the magnification to the 40x objective lens. You will see one of the 25 central squares, made up of 16 small squares. | 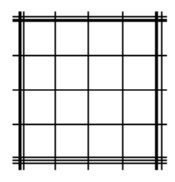 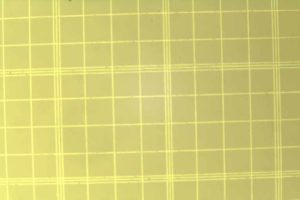 |
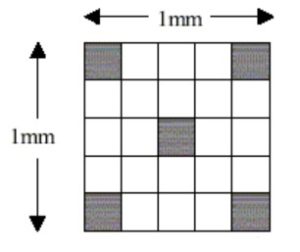
| 5. Count the cells in each of the four corner squares and the central square; (see shaded squares in instruction 3). Note that you will count five groups of 16. Include in the count those cells touching the top or right side of the square; do not count those cells touching the bottom or left side. This takes account of cells which are half in and half out the grid. | 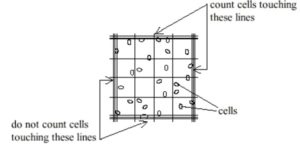 |
|
x 160
|
x 400
|

Calculation
 |
|||
| Length of side of grid | = | 1 mm | |
| Area of grid | = | 1 mm2 | |
| Depth between coverslip and slide | = | 0.1 mm | |
| Volume under squared area | = | 1 mm2 x 0.1mm | |
| (25 squares) of grid | = | 0.1 mm3 | |
| Volume under 5 squares | = | 0.1/5 mm3 | |
| (the number counted) | = | 0.02 mm3 | |
|
You have therefore counted the number of cells in 0.02 mm3 and can use the following calculation to estimate the cell concentration of your original suspension. Number of cells (total in 5 squares) in 0.02 mm3 = n Number of cells in 1 mm3 = n x 50 Number of cells in 1 cm3 = (n x 50) x 1000 If the cell suspension counted has been diluted, then the above result must be multiplied by the appropriate dilution factor to give the concentration of the original culture. |
|||

